


View all MastaCube user guides
Start a test on MastaCube
A complete step-by step guide to starting a Mastatest mastitis diagnostic test on the MastaCube
Choose your cartridge type:
Start a Single (1 sample) Test
Most of our clinical cartridge variants incorporate one test sample per cartridge.
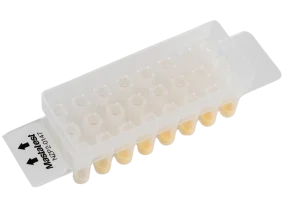
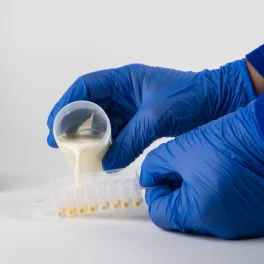
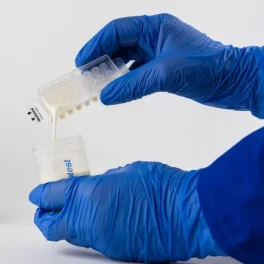
Fill the Cartridge
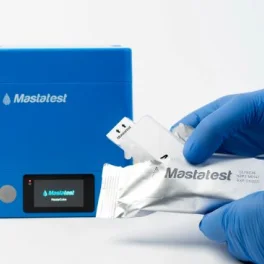
Wearing clean gloves, remove cartridge from its packaging.
Remove the cartridge lid, placing it on its flat back.
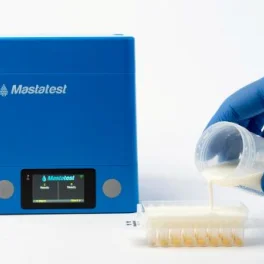
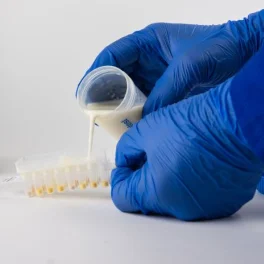
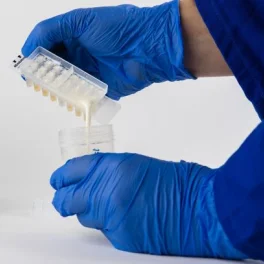
Half-fill the cartridge with your milk sample.
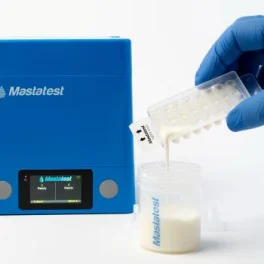
Pour off the excess milk, and discard.
NB: The correct amount of milk is automatically retained in the cartridge wells.
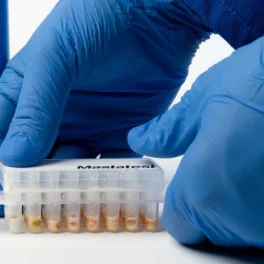
Press the cartridge lid on firmly. You will hear it 'click' as it fully closes.
Tap the filled cartridge firmly on the table, repeating 2-3 times.
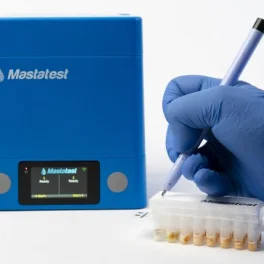
Label the cartridge clearly with Animal ID and Quarter
Start the test and enter Animal ID
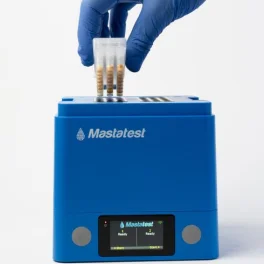
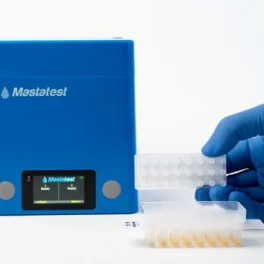
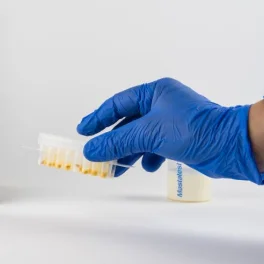
Put the cartridge in the MastaCube, with the arrows pointing towards the back. Replace the MastaCube lid.
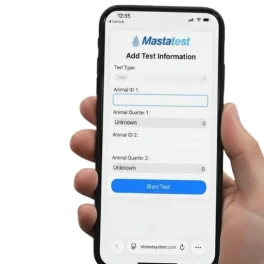
Choose from these three options to start the test, and the Enter Animal ID and Quarter
Mobile Phone
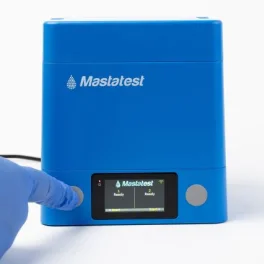
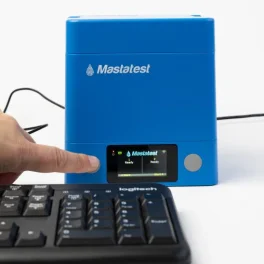
Press the grey button on the MastaCube corresponding to the Start position you have used.
- Left button for position 1
- Right button for position 2
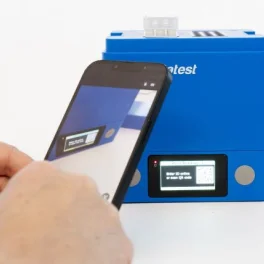
Using your mobile phone 'camera' app (or a QR code reader) scan the QR on the MastaCube screen, and select to view the displayed link.
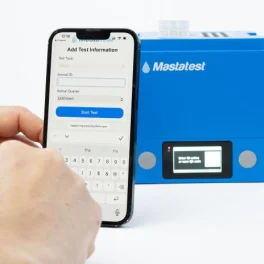
Enter the Animal ID and Quarter on the mobile phone, and press 'Start Test'.
Done! Your test has started and you will be notified of the results in under 24 hours.
The countdown timer on the MastaCube screen indicates the remaining processing time.
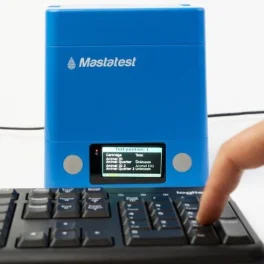
USB KeyBoard
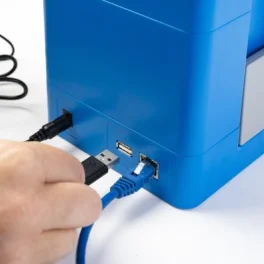
Ensure your USB Keyboard is correctly attached.
HINT: A green keyboard icon will show on the top left hand of the MastaCube screen when the keyboard is attached.
Press the grey button on the MastaCube corresponding to the Start position you have used.
- Left button for position 1
- Right button for position 2
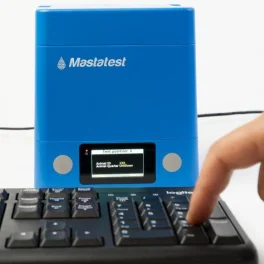
Using your keyboard:
- Enter the Animal ID number, then press ENTER (or use the down arrow)
- Select the correct Quarter by using the left/right arrow keys.
If you have made a mistake or want to edit your selection, use the backspace button or the arrow keys.
Once complete, press ENTER, then ENTER again (or the right grey MastaCube button) to confirm the start.
Done! Your test has started and you will be notified of the results in under 24 hours.
The countdown timer on the MastaCube screen indicates the remaining processing time.
Web Portal
Press the grey button on the MastaCube corresponding to the Start position you have used.
- Left button for position 1
- Right button for position 2
Press the right-hand grey button to START the test
On the Mastatest.com website, select LOGIN in the rop right hand corner
OR navigate direct to www.mastatest.com/login
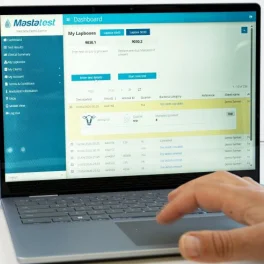
From the Dashboard page of your portal account, select the button 'Enter Test Details' that corresponds to the test position you have just started on your MastaCube.
HINT: Position 1 is that with the number ending ".1" . Position 2 is that with the number ending ".2"
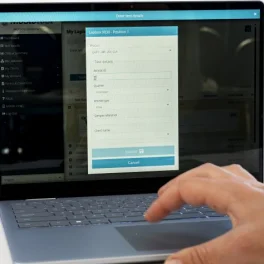
Enter the test details as prompted in the pop-up, and then press Submit when complete.
Done! Your test has started and you will be notified of the results in under 24 hours.
The countdown timer on the MastaCube screen indicates the remaining processing time.
Start a Twin (2 sample) Test
Twin cartridge variants incorporate 2 samples per cartridge and include HiSCC and MAST1.
Fill the Cartridge
Wearing clean gloves, remove cartridge from its packaging.
Note that the cartridge lid is labelled noting the placements for Sample 1 (nearest the arrows) and Sample 2 (away from the arrows).
Remove the cartridge lid, placing it on its flat back.
NB: Note that the cartridge is separated into two chambers that correspond to the lid labelling.
Half-fill chamber 1 with milk sample 1.
NB: Chamber 1 is closest to the arrows.
Pour off the excess milk from chamber 1, and discard.
The correct amount of milk is automatically retained in the cartridge wells.
Half-fill chamber 2 with milk sample 2
Pour off the excess milk from chamber 2, and discard.
The correct amount of milk is automatically retained in the cartridge wells.

Align the lid correctly on the cartridge - the arrows on the lid should point in the same direction as the arrows on the base.
Press the cartridge lid on firmly. You will hear it 'click' as it fully closes.
Tap the filled cartridge firmly on the table, repeating 2-3 times.
Label the cartridge clearly with the Animal ID and Quarters for samples 1 and 2
Start the test and enter Animal ID
Put the cartridge in the MastaCube, with the arrows pointing towards the back. Replace the MastaCube lid.
Choose from these three options to start the test, and the Enter Animal ID and Quarter
Mobile Phone
Press the grey button on the MastaCube corresponding to the Start position you have used.
- Left button for position 1
- Right button for position 2
Using your mobile phone 'camera' app (or a QR code reader) scan the QR on the MastaCube screen, and select to view the displayed link.
Enter the Animal ID and Quarter for samples 1 and 2 on the mobile phone, and press 'Start Test'.
Done! Your tests have started and you will be notified of the results in under 24 hours.
The countdown timer on the MastaCube screen indicates the remaining processing time.
USB Keyboard
Press the grey button on the MastaCube corresponding to the Start position you have used.
- Left button for position 1
- Right button for position 2
Using your keyboard:
- Enter the Animal ID for sample 1, then press ENTER (or use the down arrow)
- Select the Quarter for sample 1 by using the left/right arrow keys.
- Enter the Animal ID for sample 2, then press ENTER (or use the down arrow)
- Select the Quarter for sample 2 by using the left/right arrow keys.
If you have made a mistake or want to edit your selection, use the backspace button or the arrow keys.
Once complete, press ENTER, then ENTER again (or the right grey MastaCube button) to confirm the start.
Done! Your tests have started and you will be notified of the results in under 24 hours.
The countdown timer on the MastaCube screen indicates the remaining processing time
Web Portal
Press the grey button on the MastaCube corresponding to the Start position you have used.
- Left button for position 1
- Right button for position 2
Press the right-hand grey button to START the test
On the Mastatest.com website, select LOGIN in the rop right hand corner
OR navigate direct to www.mastatest.com/login
From the Dashboard page of your portal account, select the button 'Enter Test Details' that corresponds to the test position you have just started on your MastaCube.
HINT: Position 1 is that with the number ending ".1" . Position 2 is that with the number ending ".2"
Enter the test details for Sample 1 and Sample 2 as prompted in the pop-up, and then press Submit when complete.
Done! Your test has started and you will be notified of the results in under 24 hours.
The countdown timer on the MastaCube screen indicates the remaining processing time.